Design your drawer with the Toko visualizer. Enter in the dimensions and everything is calculated to fit automatically. When you’re ready to add your design to the cart, it will pull in all the individual components.
Have fun organizing!
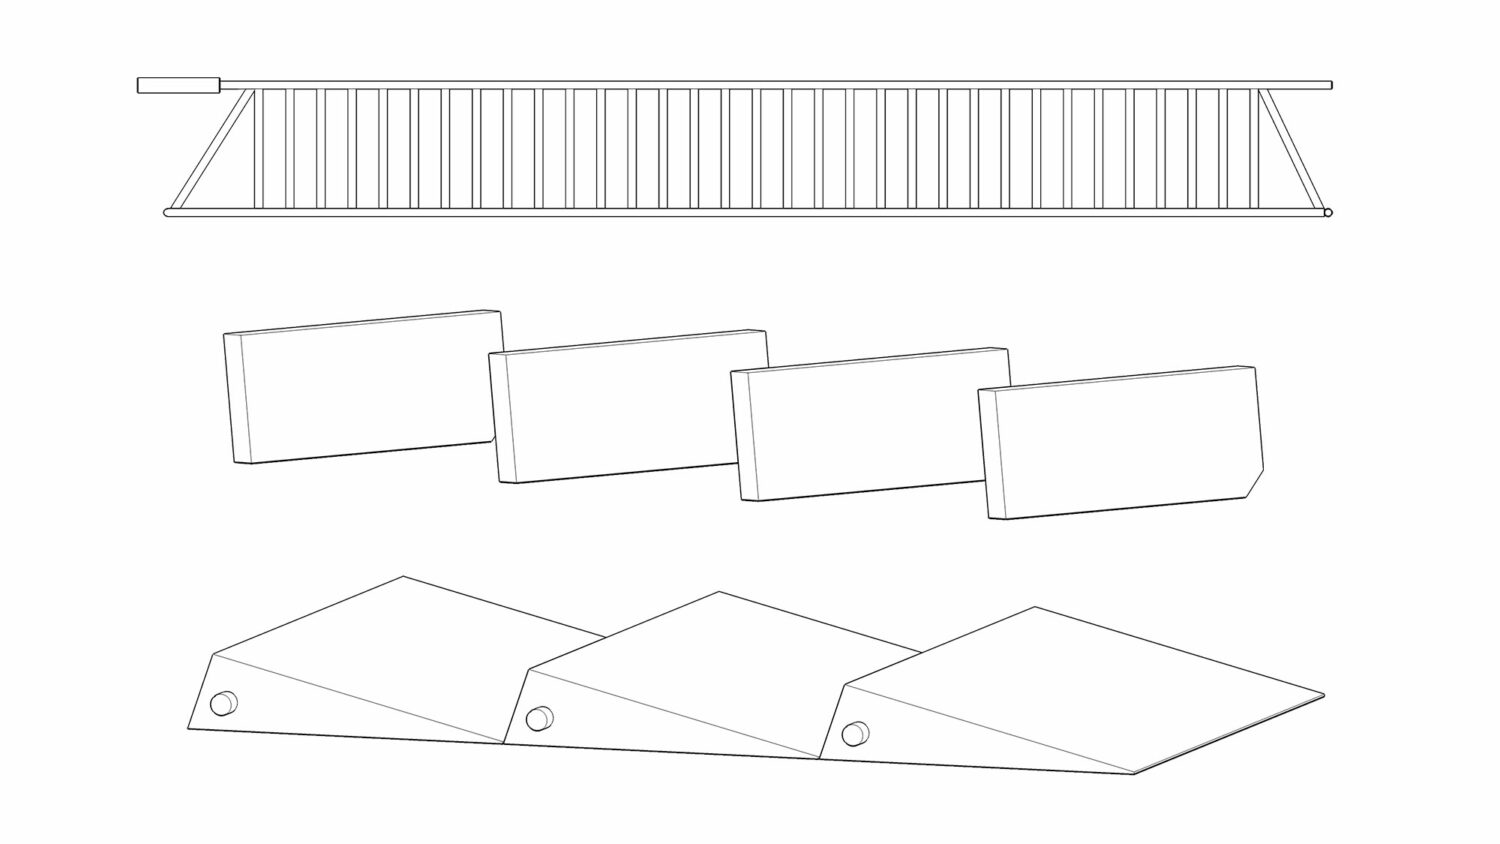
03d. Silverware tray accessories come in sets of five trays with six large dividers.
Please note if your drawer is 18″ deep (front to back) you will only be able to install four trays as shown with the visualizer when you designed your drawer.Design your drawer with the Toko visualizer. Enter in the dimensions and everything is calculated to fit automatically. When you’re ready to add your design to the cart, it will pull in all the individual components.
Have fun organizing!
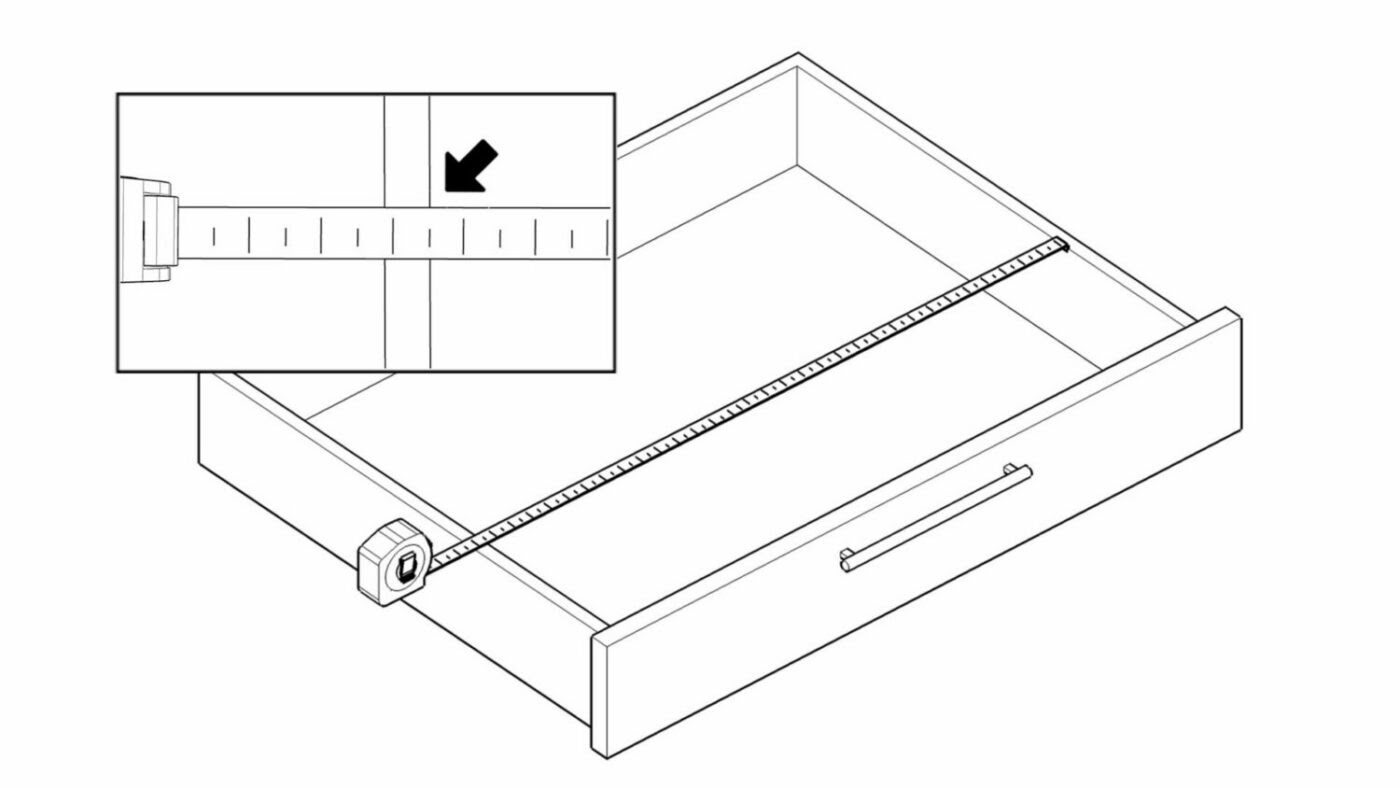
Using a tape measure find the interior width of your drawer (side to side). Make sure to measure the inside edges. Record the measurement and then round down to the nearest ½”.
For example if your drawer is 20 ¾” you should round down to 20 ½”. If your drawer already falls exactly on a ½” measurement (like 20″ or 20 ½”) use that number when entering the width.
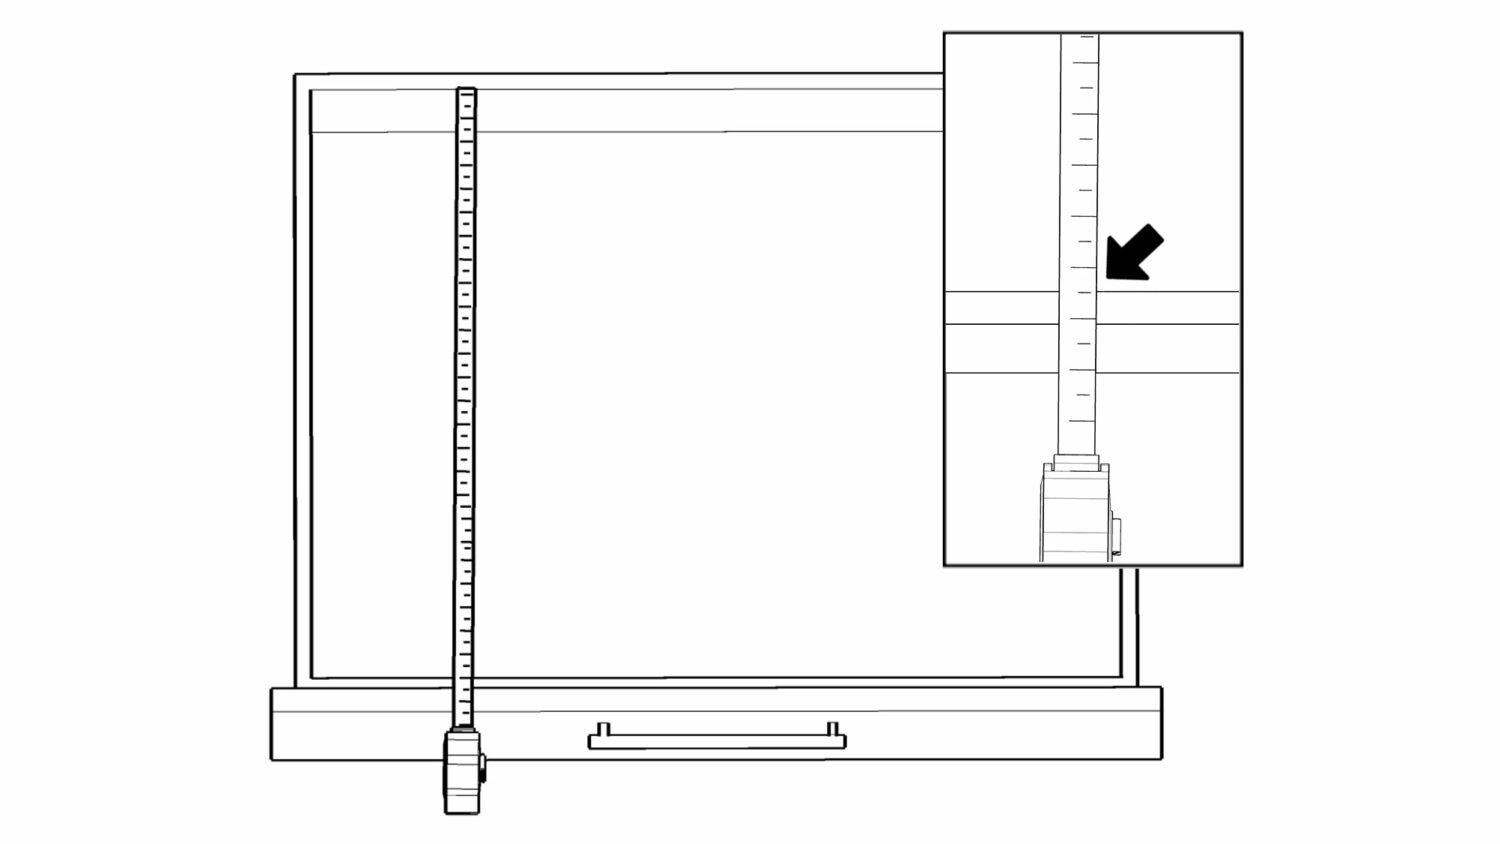
Using a tape measure find the interior depth of your drawer (front to back). Make sure to measure the inside edges. Record the measurement and then round down to the nearest ½”.
For example if your drawer is 19 ¼” you would round down to 19″. If your drawer already falls exactly on a ½” measurement (like 19 ½″ or 19″) use that number when entering the depth.
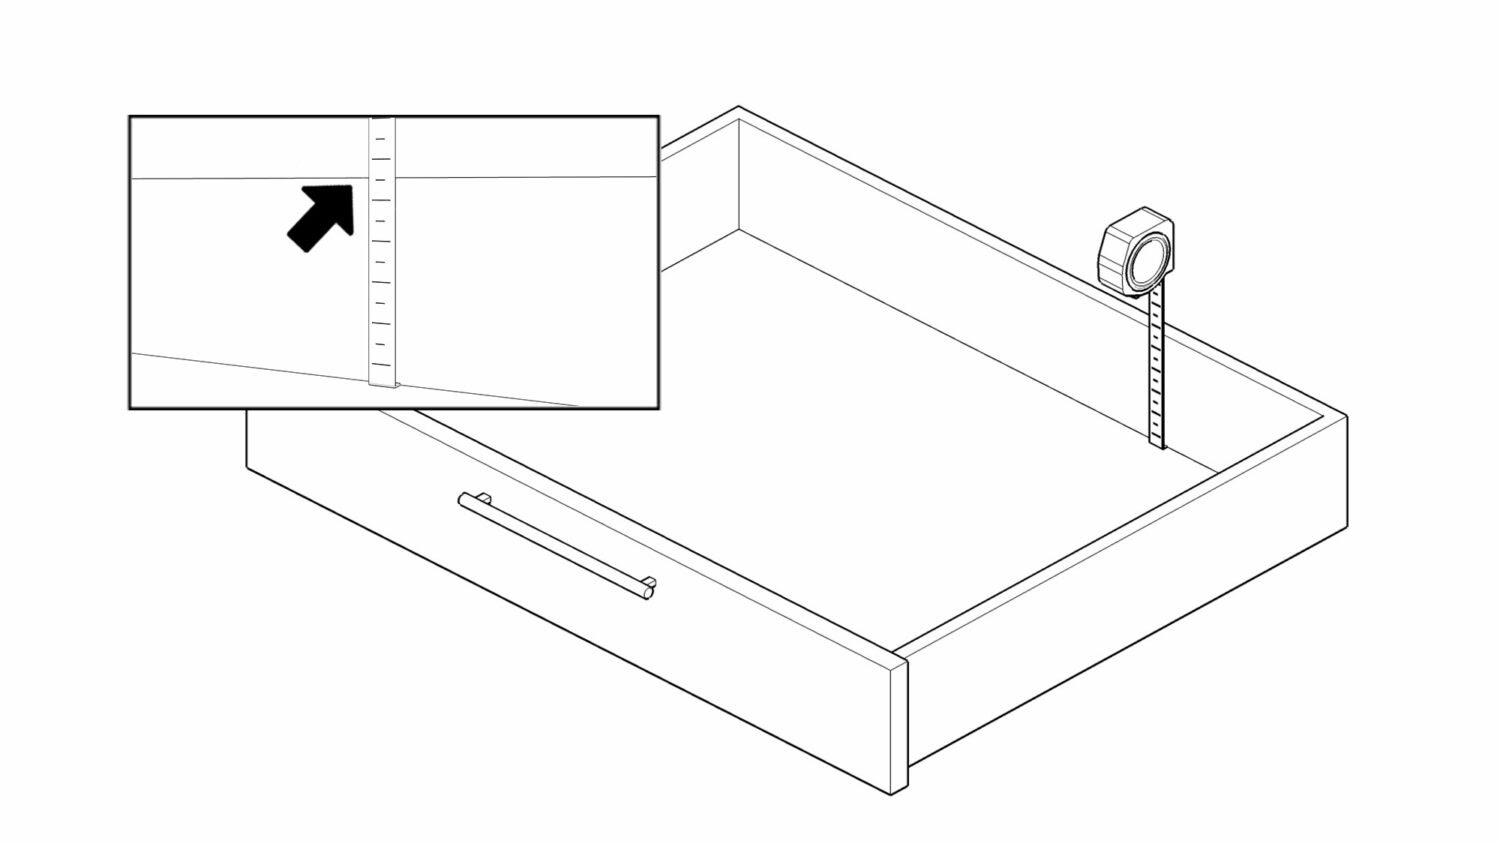
Using a tape measure check the height at the back of your drawer (top to bottom). Toko works in drawers 2 ½” or taller. In the rare case that your drawer is shorter, the system may not fit correctly.
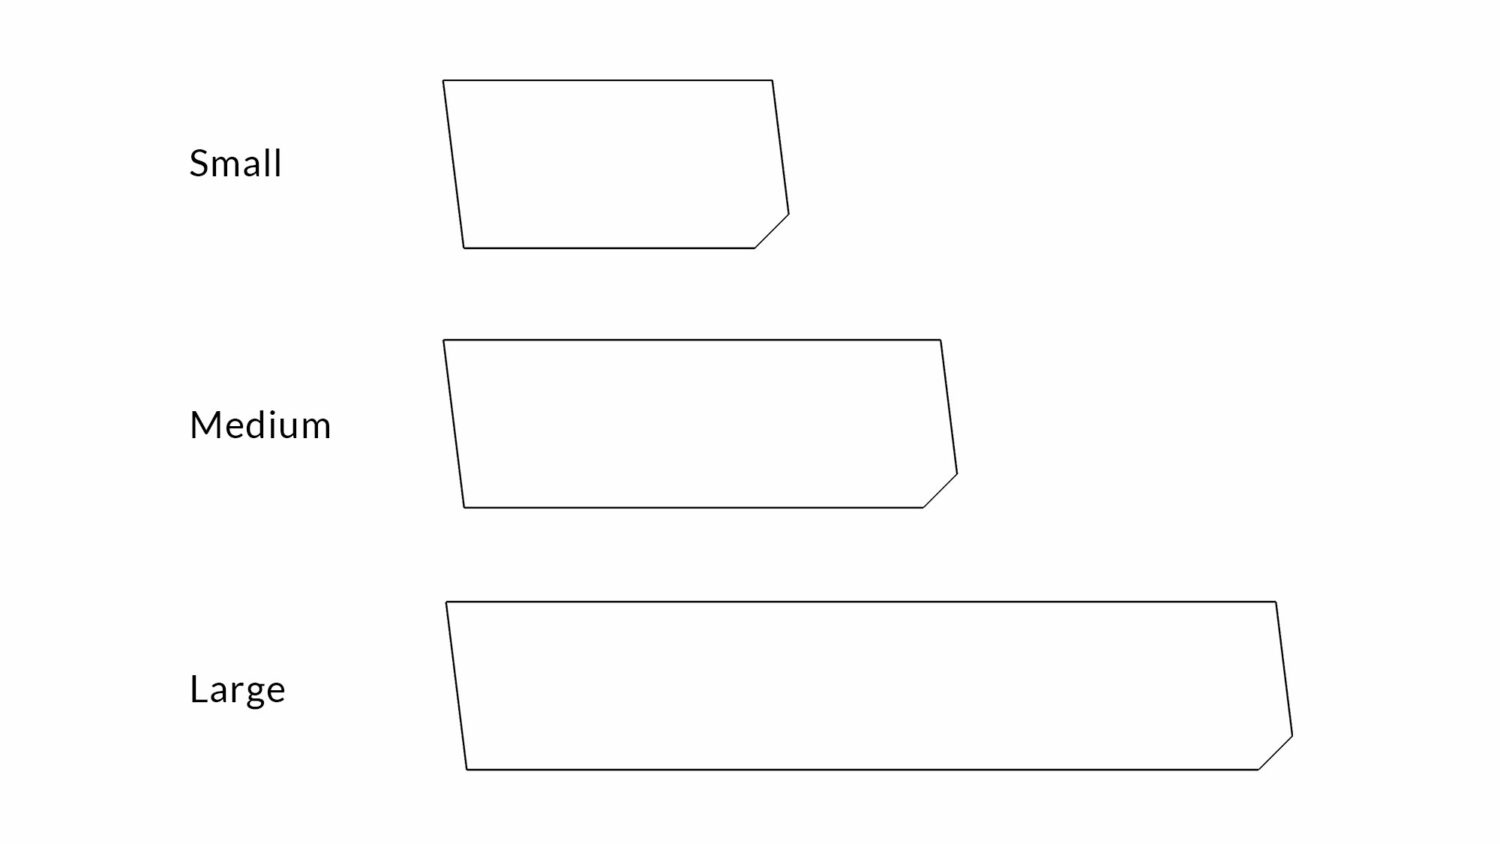
Now the fun stuff! You can choose from several layouts that all fit your drawer. Each one is made up of combinations of three bay sizes —
Small 4″ | Medium 6″ | Large 10″
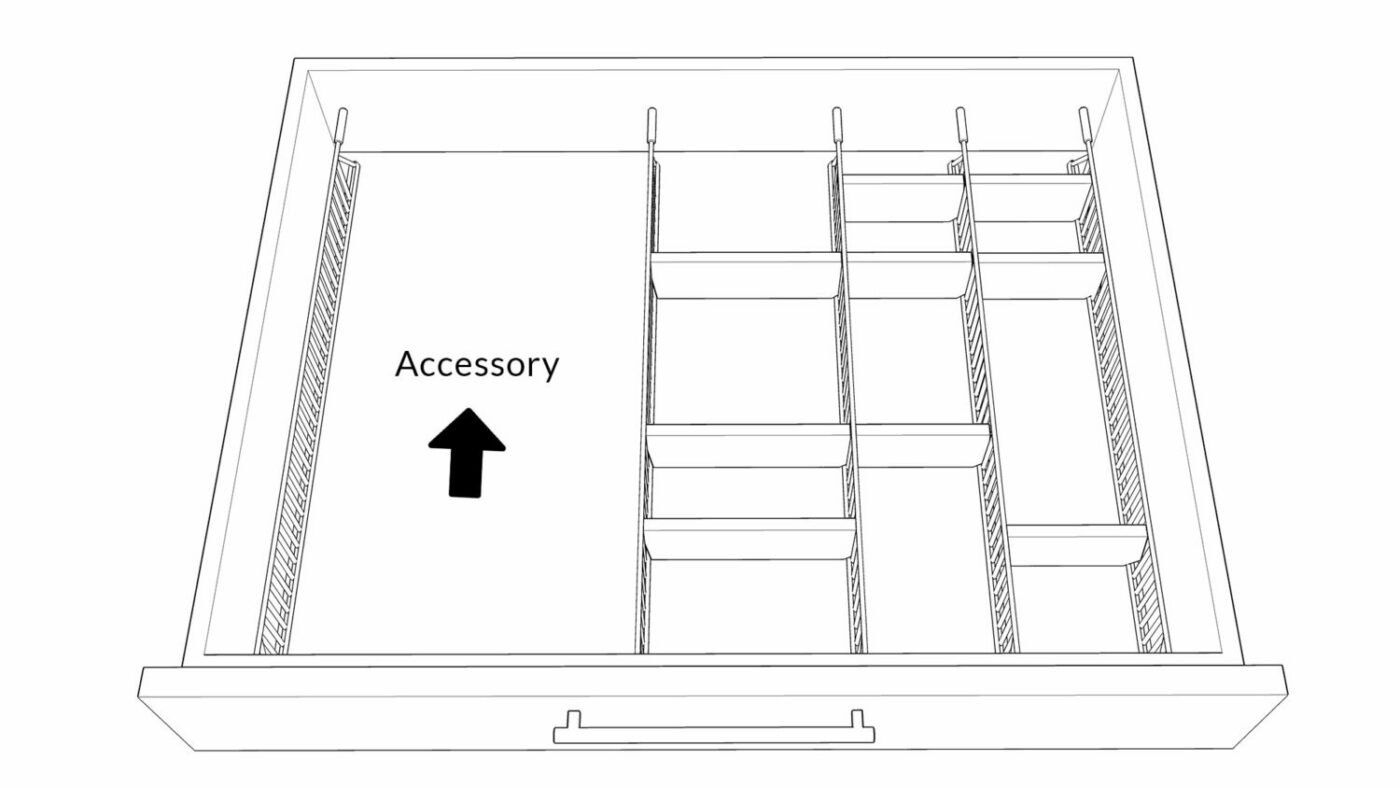
You can create spaces by moving dividers anywhere inside the bays and add in special accessories like knife blocks, spice racks, and silverware trays. If you’re unable to add an accessory that you want, try picking a different layout — the combinations are endless!
This guide is only if you want to pick out individual parts of the Toko system. If you are using the visualizer everything is calculated to work automatically. Have fun exploring!
The system is made up of three basic parts —
Rails that form the foundation of the system. Dividers that can be placed anywhere to create custom spaces. Accessories that are tailored to individual items like knife blocks and spice racks to keep them neatly in place.
Toko is designed with three bay sizes that can be placed in any combination. The bays are created by rails that span the depth of your drawer and are secured in place through tension.
Small 4″ | Medium 6″ | Large 10″
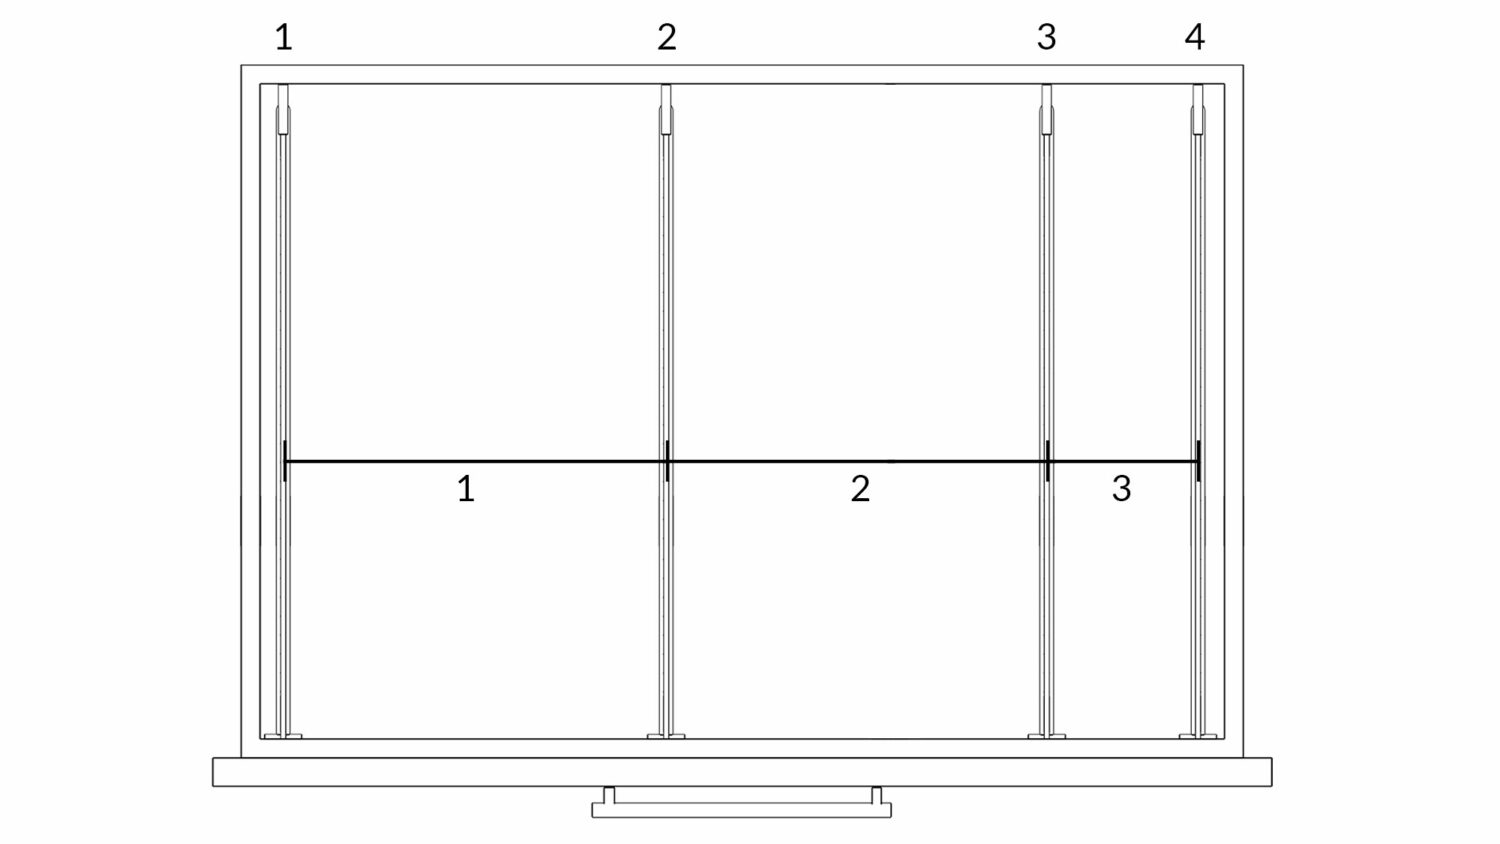
Using a tape measure find the interior width of your drawer (side to side). Make sure to measure the inside edges.
Record the measurement and then subtract 1″. This has to do with how the system is designed and is an important step. For example if your drawer is 25 ½” wide you would use 24 ½” when creating the layout.
Create a combination using the different bay sizes that fills the width of your drawer. For example the drawer measured above could have the following layouts —
Each bay can be filled with either dividers or an accessory.
Dividers can be placed anywhere between rails to create custom spaces. Accessories like knife blocks, spice racks, and silverware trays are designed for specific bay sizes.
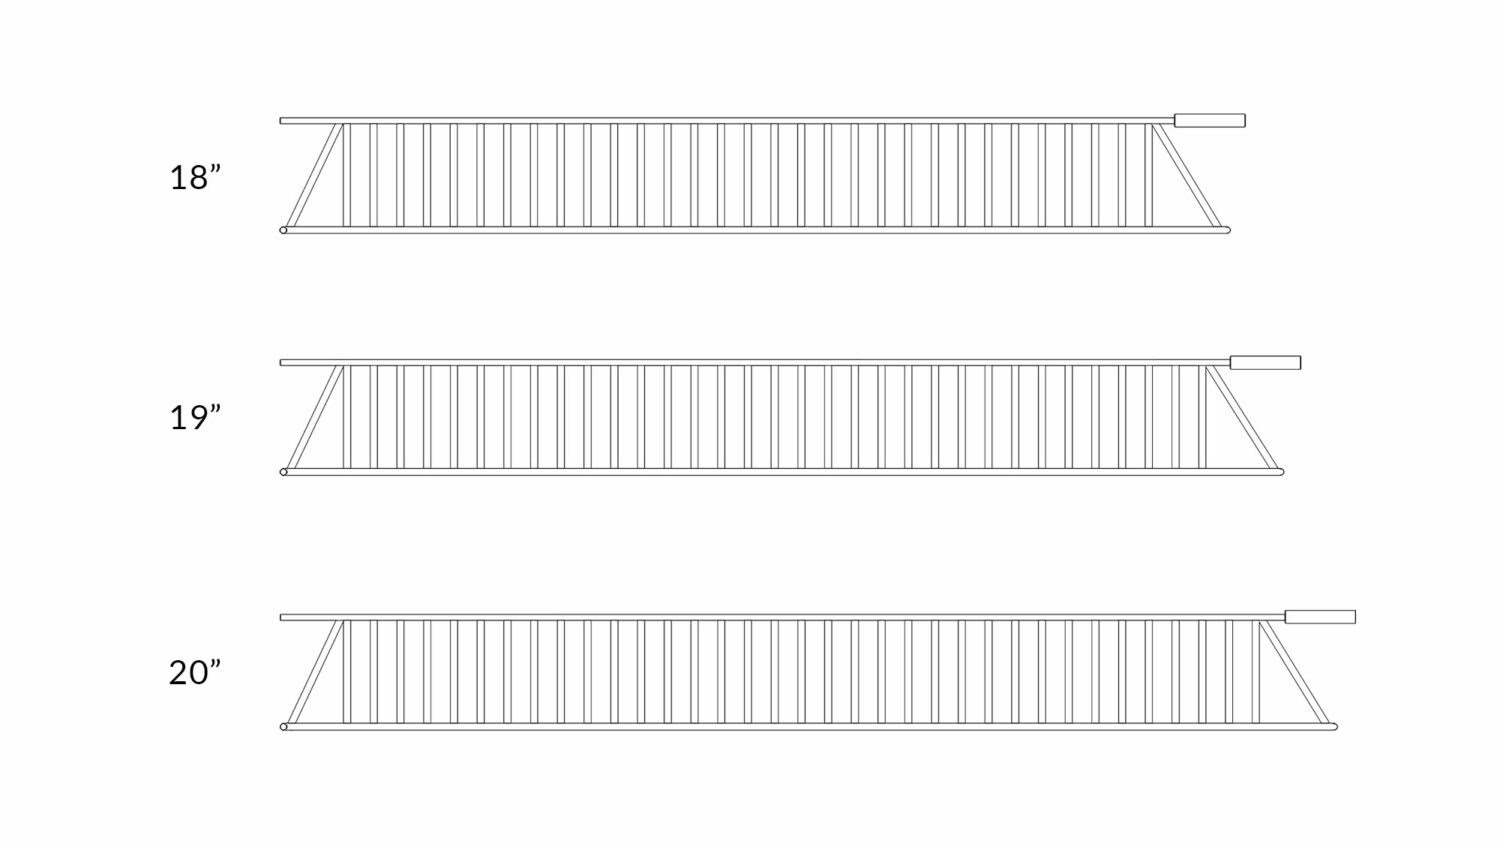
Using a tape measure find the interior depth of your drawer (front to back). Make sure to measure the inside edges.
Record the measurement and round down to the nearest inch. For example if your drawer is 19 ¾” you would use 19″ when selecting the rail size.
Toko has three rail sizes and it is important to get the right one for your drawer. The system currently works in drawers 18-21″ deep.
The quantity of rails you need to purchase is based on the layout you designed for your drawer.
Count how many bays you have and then add one additional rail. For example if your layout has three bays you would need four rails.
Dividers come in three sizes that correspond to the different bays. Make sure to get the right size dividers for the bays in your layout.
Dividers are sold in sets of four and can be placed anywhere to create different spaces to organize your things. You can use as few or as many dividers as you want inside each bay.
Typically you should fill every bay in your layout with the right size divider. However, if you want to include an accessory like a knife block or spice rack you should leave that bay empty.
Boxes come in three sizes that correspond to the different bays. Each box can be placed anywhere inside a bay and comes with two additional dividers to create extra spaces for organization.
Knife blocks fit the medium 6″ bay and are secured in place with pegs. They come in sets of one knife block with one knife rest.
Spice racks fit the large 10″ bay and are secured in place with pegs. They come in sets of three racks that can be combined seamlessly to add as many rows as you want.
Silverware trays fit the large 10″ bay and are secured in place between dividers. They come in sets of five trays with six dividers that can be set up and combined seamlessly to make as many rows as you need.